
First Look: LG G3 Teardown
Month after month of speculation and rumors have finally led us here, and uBreakiFix has the sincere pleasure to provide you with the first LG G3 Teardown! Take a look inside LG’s new flagship powerhouse, the G3.
For this teardown, we will be using the Samsung Galaxy S5 and HTC One (M8) for comparison.
First, let’s review the specs:
- 5.5” True HD-IPS LCD (1440 x 2560, ~534 ppi)
- 13 MP rear camera with 2160p@30fps video; 2.1 MP front camera with 1080p@30fps video
- Highly touted 1W loudspeaker with boost amp
- 2.5 GHz quad-core Snapdragon 801 processor
- 2 GB (16 GB model) or 3 GB (32 GB model) LPDDR3 RAM
- LTE, NFC, Bluetooth 4.0 LE, Wi-Fi 802.11 a/b/g/n/ac dual-band
- MicroUSB 2.0 (SlimPort)
- Li-Ion 3000 mAh battery
Now that we know what we should see under the hood, let’s get down to business.

Starting on the outside front of the phone we see the 5.5” LCD, ear speaker, front camera, and infrared and proximity sensors. On the back is the highly-advertised 1W loudspeaker, rear camera and dual-LED flash, and power/volume buttons. Along the bottom a MicroUSB 2.0 SlimPort, and 3.5mm stereo jack.
Alright, enough gawking, time to see what makes LG‘s new G3 flagship tick.
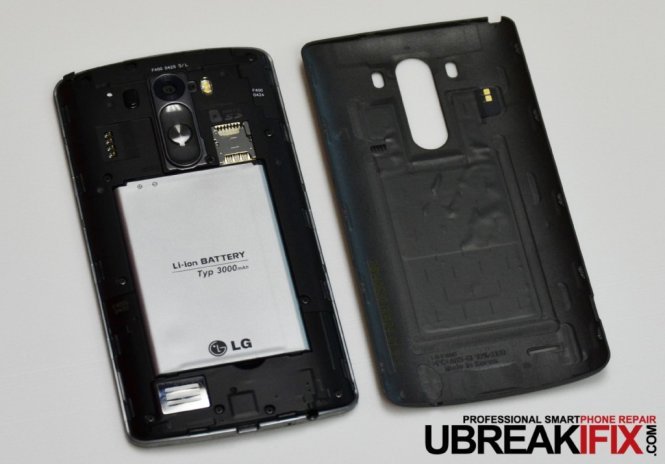
We begin with the ubiquitous battery cover. Once removed we see the Li-Ion 3000 mAh battery, larger than the Galaxy S5 at 2800 mAh or the HTC One (M8) at 2600 mAh, the lowest capacity of the three (surprisingly low for not being user-removable). Built into the battery cover is the wireless charging interface. Even with the extra mAh we wouldn’t be surprised if users didn’t see the benefits as the new and improved Quad HD screen likely draws extra power.
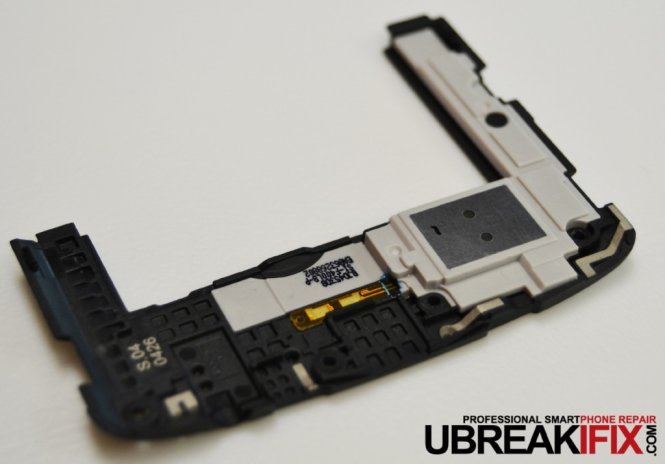
Next we remove the lower back housing which contains the loudspeaker assembly.
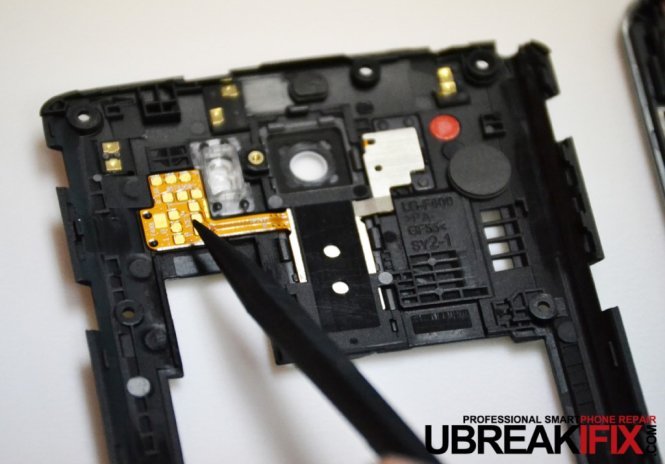
After that, the upper back housing is removed exposing the contacts for the power/volume button flex as well as the phase detection/laser autofocus module.
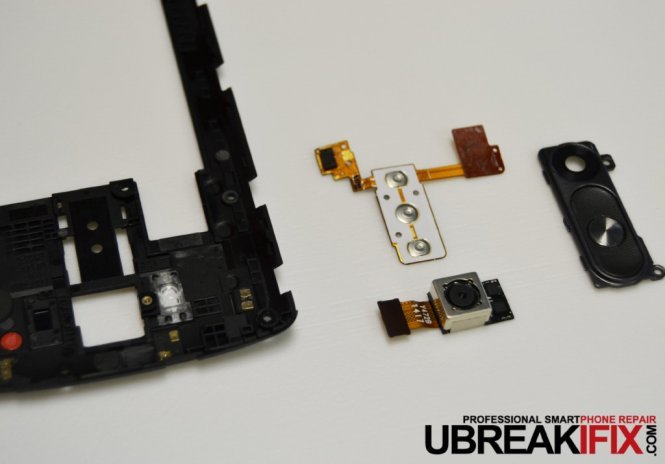
Once the button cover is removed from this housing piece we can see this flex assembly.
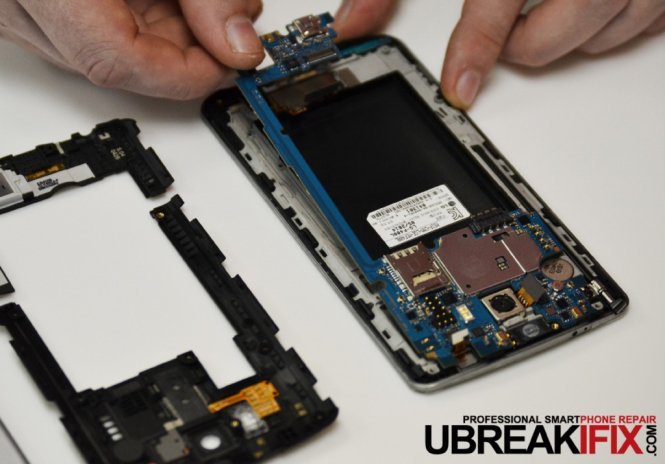
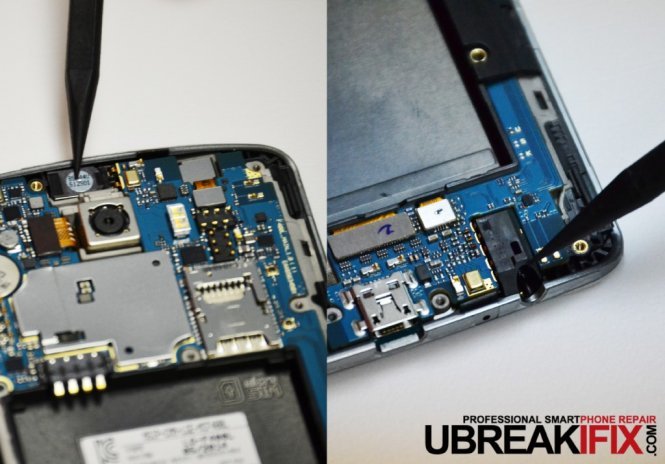
Finally we get to see the motherboard. One of the first differences we notice is that there is only one small daughterboard, unlike the G2 which had another controller board split along both sides of the motherboard.
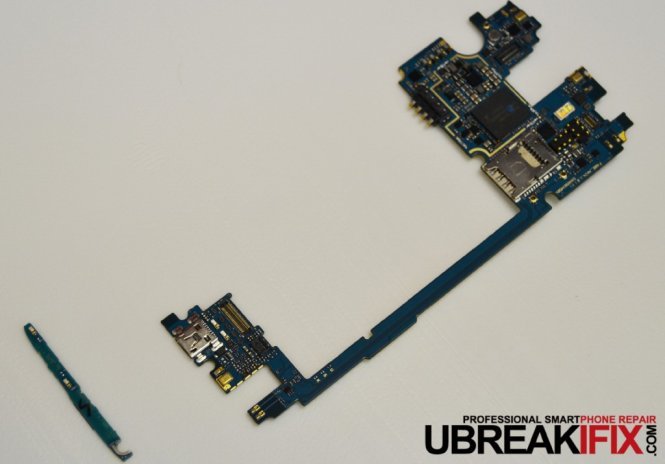
A few flex connectors later and we are able to remove the motherboard, the only other board in the phone located at the bottom is most-likely for grounding.
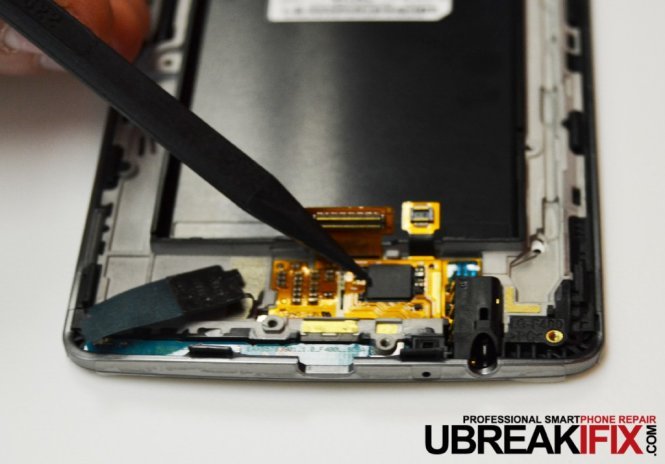
Directly above that board are the flex connectors for the LCD and digitizer which is assisted by a Synaptics 93528A touchscreen controller. This absolutely stunning LCD has been advertised as a Quad HD display and sports a staggering 534 ppi pixel density which blows away the S5 at 432 ppi and the One (M8) at 441 ppi.
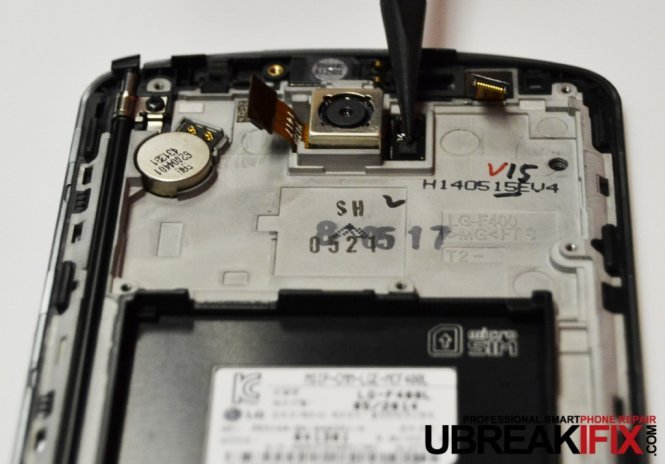
We can also see the 13 MP rear camera (4160 x 3120 pixels), which has been one of the major selling points for the G3 and with 2160p video resolution at 30fps, it’s no wonder why. Looking at the competition we see the S5 with very similar resolution at 16 MP (5312 x 2988 pixels) and 2160p@30fps video, and the One (M8) with dual 4 MP (2688х1520 pixels) with 1080p@60fps video.
Also visible is the front camera is 2.1 MP, slightly better than the 2 MP in the S5 but drastically less than the One (M8) which brings a 5 MP front camera to the table.
Lastly, adhered directly to the back housing are the 3.5mm headphone jack and the ear speaker.
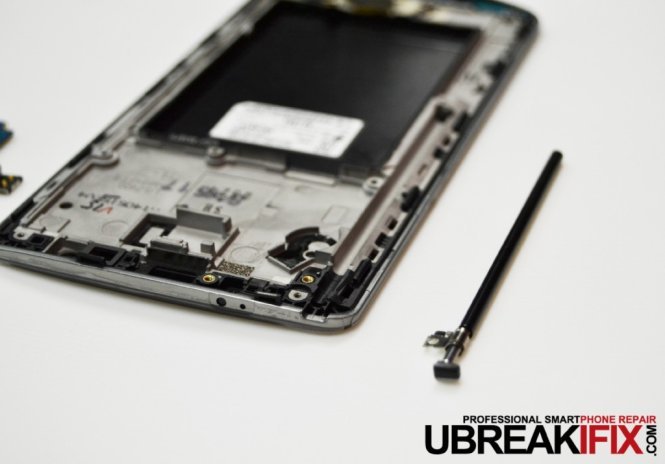
What’s that odd looking component on the right? Well this is what we call an antenna, they were used on cell phones many years ago for better reception. This one however is for TV tuning although it is not likely the US version of the G3 will include a TV tuner antenna.
Once we remove the metal shields from the motherboard we are able to see many more chips, some of which we have already identified.
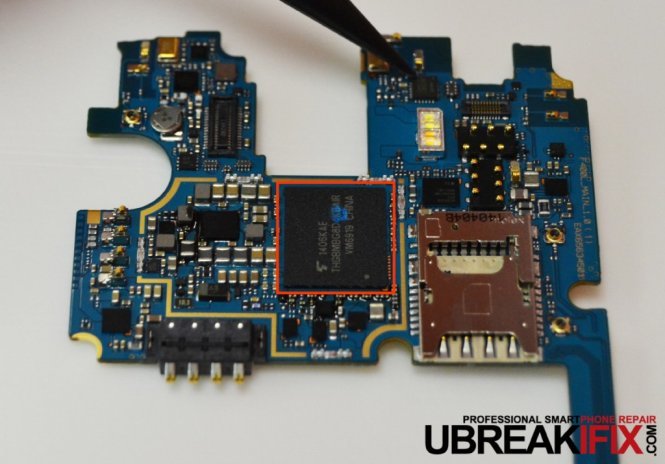
On the top side of the motherboard we see:
- (Orange) Toshiba THGBMBG8D4KBAIR 32 GB on-board NAND flash memory
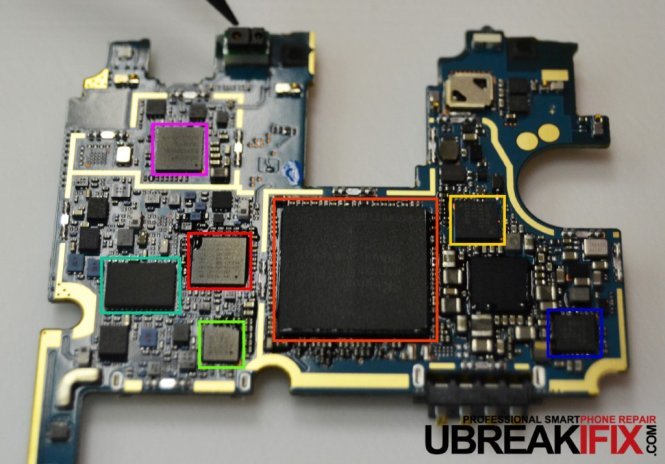
On the bottom side of the motherboard we see:
- (Purple) Broadcom BCM4339 5G WiFi combo chip
- (Teal) Avago ACPM-7700 power amplifier module
- (Red) Qualcomm WTR1625L RF transceiver
- (Green) Qualcomm WFR1620 receive-only companion chip
- (Orange) SK Hynix 2GB/3GB LPDDR3 RAM layered on the 2.5 GHz quad-core Snapdragon 801 processor.
- (Yellow) ANX7812 USB SlimPort Tx IC
- (Blue) Texas Instruments BQ24296 battery charge management and system power path management chip.
Overall, initial impressions are that this is a beautifully engineered phone. The use of several contact-style connectors instead of flexes will certainly reduce repair time and the location of the LCD/digitizer connectors give the G3 a much higher repairability factor than its predecessor; on a scale of 1 to 10, the LG G3 scores a respectable 8/10.